Web Style Guide Chapter 7
Image Thumbnail Exercise
(50 Points)
Objective: To learn how to create a thumbnail image so that your web pages will load faster.
Task: You will be creating 2 versions of an image, one will be the thumbnail and the other will be the full size image. You will also create 2 web pages, the "thumbnail.html" and "fullsizegraphic.html".
Instructor's Notes:
One topic that Chapter 7 does not cover is Thumbnails. These are an important feature of web pages. Thumbnails are small versions of larger graphics. This allows for quick loading of a web page. If the user wants to see the larger version, all they need to do it to click on the graphic.
Click on the above thumbnail to see the full-size graphic in another browser window.
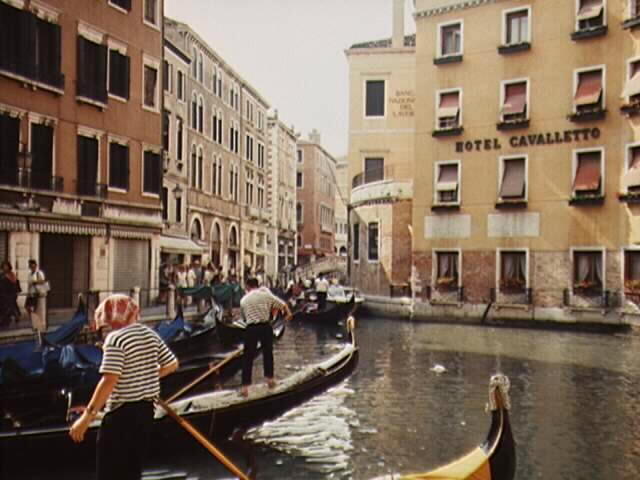
The HTML code is
<a href = "italy_fullsize.jpg">
<img src = "italy_thumbnail.jpg" />
</a>
Click on the above thumbnail to see the full-size image in another web page.
The HTML code is
<a href = "fullsizegraphic.html" >
<img src = "italy_thumbnail.jpg" />
</a>
To create Thumbnails, there needs to be two versions of the picture...a regular size graphic and a smaller size graphic. A graphics program such as PhotoPlus 6.0 or Photoshop Elements can be used to resize/resample the graphic. MSPaint does not have this functionality. (Note: Just changing the height and width properties is not an alternative. This will reduce the size on the screen but will not reduce the file size and therefore has no effect on the download time). On the Italy pictures, the regular graphic is 48k and the thumbnail is 5k.
In PhotoPlus 6.0 or Photoshop Elements, go to File | Open and open your graphic. You can also get your image from Google. From the Image menu, choose Resize. Resize the graphic as desired. When ready to save, choose Save As so that the original, large version is not overwritten. Save the new version as tn_grapic.gif, graphic_thumbnail.gif, small_graphic.gif or whatever naming convention you choose.
Create a new HTML document using Windows Notepad, NVU, or WebPlus 6.0 with:
- Title of exercise
- Your name
Add the html thumbnail code listed above and save your web page as "thumbnail.html". Remember to place all your actual images in a separate image folder (preferrably named "image").
Create a separate html page and call it "fullsizegraphic.html. Add the full size image to your web page.
Click here to see what your page should look like
Your next task will be to add a link that will take you back to the thumbnail html page, you can name it "Go Back to Thumbnail".
The sample code should look like the following:
"<a href="thumbnail.htm"/> </a> "
FTP this file to your proj folder on the Potomac server and send me the link.